

Thru-The-Wall HV Wiring System (Quik-Connects)
5 products Need help choosing? Call (480) 820-9517
You searched "". Here is our Thru-The-Wall HV Wiring System (Quik-Connects) section. Search only for "" instead
One device does it all! Twist to connect… Simple and quick!
Quik-Connects™ provide compliance with NEC Sign Code Sections 300.4, 600.33 & 725.136 to protect HV Neon wiring from physical damage. Versatile smooth-walled feed-thru insulators protect insulated sign wires. Use with all wire types from low voltage LED through high-voltage Neon GTO. Male threading and choice of locknut provides a simple and elegant insulating solution. Each pass-thru is supplied with a standard locknut.



 Discontinued
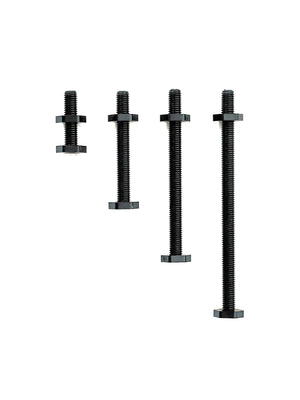
Thru-The-Wall Pass-Thru
Each or case · 2", 4", 6", 8"
 Discontinued
Thru-The-Wall Female Locknut
 Discontinued
Thru-The-Wall Male Locknut
 Discontinued
Thru-The-Wall Extra Locknut
 Discontinued
Non-Metallic Greenfield
100 ft
More about Thru-The-Wall HV Wiring System (Quik-Connects)
Use by itself or easily connect it to Female or Male Locknut together with Non-Metallic Greenfield (NMG) Flexible Quik-Connects™ to accommodate most any interior electric sign installation! Provides unmatched versatility in the field. Requires drilling only a 9/16” hole for installation.
Insulating Bushings
Pass-Thru Sizing Chart
| Pass-thru length | Max panel thickness (inches) |
|---|---|
| 2" | 1.75" |
| 4" | 3.75" |
| 6" | 5.75" |
| 8" | 7.75" |

Substitute Masters Technology "Sleeving"! The Sleeving pushes tightly onto the Male and Female locknuts. The Sleeving is UL Listed for Dry, Damp and Wet location High-Voltage Neon runs. AND... it costs LE$$!

Typical Installation


Example Step-By-Step Installation
In this example, we show a standard 2 x 4 wall with sheetrock on each side. Use these same procedures for any thickness material you want to pass high-voltage wire thru.
-
#1. Drill a 5/8" to 3/4" hole through the surface you want to run the high-voltage wire thru.

-
#2. Choose the right length Pass-Thru for the job. In this case, it would be the 6" model.

-
#3. Install the Pass-Thru through the drilled hole and secure in place with the nut on the rear side.
Rear side / Front "neon" side (*side of the wall the neon will be mounted on).

-
#4. Install a Female Locknut on the rear side of the wall onto the threads of the Pass-Thru and tighten down.

-
#5. The Female Locknut is now installed.

-
#6. Cut a length of the Non-Metallic Greenfield to cover a high-voltage run from the wall Pass-Thru to your next connection point.

-
#7. Simply "twist" the Non-Metallic Greenfield onto the male shaft located on the Female Locknut.

-
#8. The other end of the Non Metallic Greenfield would either be routed to another piece of neon or a Metal Transformer Box as pictured. If going to a transformer box, a Male Locknut would be used. The Male Locknut would be bolted to a service knockout on the box, which would allow the Non-Metallic Greenfield to twist onto it. The installation is complete and ready for the high-voltage wire to be run through the installation.
Pictured: transformer box, knockout, male locknut.


